


Frequently Asked Electronic Music Production Questions and Answers
What is the difference between mixing and mastering?
Mixing and mastering are two distinct but closely related stages in finishing a track, and understanding how they differ is essential for improving your results.
Mixing is where you work on the individual elements within your project — adjusting levels, applying EQ to shape frequencies, using compression to control dynamics, and adding effects like reverb and delay to create space and depth. The goal of mixing is to ensure every sound sits clearly and works together as a cohesive whole.
Mastering, by contrast, happens after the mix is complete. It focuses on the final stereo file, ensuring the track translates well across different playback systems, reaches an appropriate loudness, and maintains tonal balance. Mastering is about refinement and consistency, not fixing major mix issues.
A key principle is that a great master starts with a great mix — mastering can enhance, but not rescue, a weak mix.
→ Learn both stages in context:
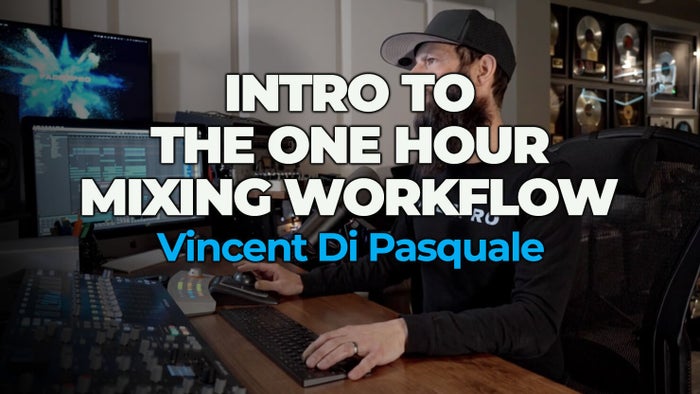
One Hour Mixing Workflow w/ Vincent DiPasquale
Secrets of Pro Mastering
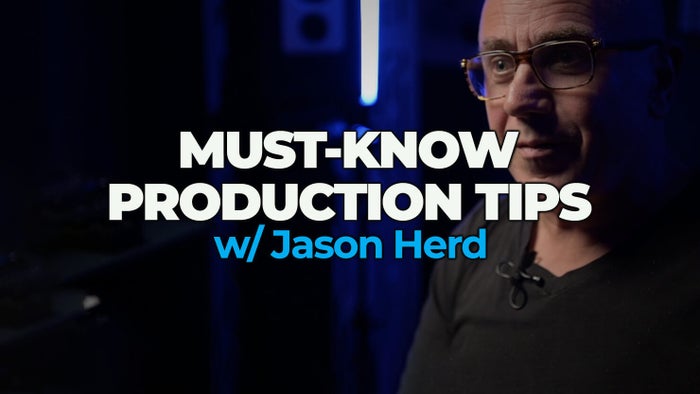
Jason Herd: Creating a Final Mixdown
How do I make my mix sound more professional?
A professional mix is the result of a series of good decisions rather than one specific technique or plugin. The most important starting point is balance — if your levels are right, your mix will already sound significantly better.
From there, focus on frequency management. Use EQ to carve out space so elements don’t compete, particularly in the low and low-mid frequencies where muddiness often builds up. Then use compression to control dynamics and ensure consistency, especially on vocals, drums, and bass.
Another often overlooked factor is arrangement. If too many sounds are playing at once, no amount of mixing will create clarity. Reducing clutter can dramatically improve the perceived quality of your mix.
Professional mixes tend to feel clear, controlled, and intentional. They are usually built on strong source sounds, thoughtful processing, and a clear sense of what should sit at the front of the record versus what should support in the background.
→ Learn practical workflows here:
One Hour Mixing Workflow w/ Vincent DiPasquale
Jason Herd: Creating a Final Mixdown
Martin Ikin: Secrets of Tech House
What is EQ and how should I use it?
EQ (equalisation) is one of the most powerful tools in music production because it directly controls how sounds occupy the frequency spectrum.
At its core, EQ is used in three main ways:
- Cleaning: removing unwanted frequencies such as rumble, muddiness, or harshness
- Shaping: enhancing the tonal character of a sound
- Separating: creating space so different elements don’t clash
For example, you might remove low frequencies from a pad to make room for the bass, or reduce midrange frequencies in a synth to allow vocals to cut through more clearly.
A common mistake is over-boosting. In many cases, cutting frequencies is more effective and natural-sounding than boosting them.
Understanding how to use EQ across the entire mix — not just on individual sounds — is key to achieving clarity and balance. The best producers use EQ both surgically and creatively, depending on whether they are solving a problem or enhancing a musical idea.
→ Deep dive into EQ techniques:
The Science of Sound: Equalization
Jason Herd: Mixing Kick and Bass
Sound Design w/ James Egbert
When should I use compression?
Compression is used to control the dynamic range of a sound — in other words, the difference between its loudest and quietest parts.
You might use compression to:
- Tighten and add punch to drums
- Keep vocals consistent in volume
- Smooth out bass performance
- Glue multiple elements together in a bus
Different settings produce different results. A fast attack can tame transients, while a slower attack can preserve punch. Parallel compression can add energy without losing dynamics, and sidechain compression can create space between competing elements.
The key is to use compression with intention. Instead of applying it automatically, ask what problem you’re trying to solve or what effect you’re trying to achieve.
Used well, compression can make a track feel more controlled, more energetic, and more polished. Used badly, it can flatten the life out of a mix, so learning when to compress is just as important as learning how.
→ See compression in real workflows:
The Science of Sound: Compression
Jason Herd: Mixing on the Fly
Piero Pirupa Track from Scratch
Why does my mix sound muddy?
Muddiness is one of the most common issues in music production and usually comes from too much energy in the low-mid frequency range (roughly 150–400 Hz).
This often happens when multiple elements — such as pads, bass, synths, and reverbs — overlap in the same frequency space. When too many sounds compete in this range, the mix loses clarity and definition.
Fixing muddiness typically involves:
- Using EQ to remove unnecessary low-mid frequencies
- Choosing sounds that naturally fit together
- Simplifying your arrangement to reduce overlap
- Controlling reverb and low-end buildup
Importantly, mud is rarely caused by a single element — it’s usually the result of how multiple elements interact.
A clearer mix often comes from making many small improvements rather than one dramatic change. Better sound selection, tighter arrangement choices, and more disciplined EQ decisions all contribute to a cleaner, more open result.
→ Learn how to clean up mixes:
The Science of Sound: Equalization
Jason Herd: Mixing Kick and Bass
Wankelmut Track from Scratch
How loud should my track be before mastering?
Before mastering, your track should prioritise clarity and headroom rather than loudness.
A well-prepared mix will:
- Avoid clipping on the master channel
- Maintain healthy dynamics
- Have controlled peaks
- Sound balanced without heavy limiting
Trying to make your track loud at the mixing stage often leads to distortion and reduced dynamic range, which limits what mastering can achieve.
Instead, think of mastering as the stage where loudness is finalised — your job during mixing is to deliver a clean, well-balanced premaster.
A strong premaster should already feel musical, punchy, and emotionally effective without relying on excessive loudness processing. That gives mastering room to enhance impact rather than undo damage.
→ See how pros prepare mixes:
One Hour Mixing Workflow w/ Vincent DiPasquale
Secrets of Pro Mastering
Nicky Romero Digital Music Masterclass (Part 3)
What is gain staging and why is it important?
Gain staging is the process of managing levels throughout your entire project so that every stage of the signal chain operates efficiently.
If levels are too high, you risk distortion and unpredictable plugin behaviour. If they are too low, you may lose clarity and impact.
Good gain staging ensures:
- Plugins behave as intended
- You maintain headroom
- Your mix stays clean and controlled
It also makes mixing easier, because you’re not constantly fighting level issues while trying to make creative decisions.
In practice, gain staging is less about strict rules and more about maintaining consistent, sensible levels throughout your workflow. It helps you build a stable foundation, which means every EQ move, compressor setting, and automation change is easier to judge accurately.
→ Learn this foundational skill:
The Science of Sound: Volume Management
One Hour Mixing Workflow w/ Vincent DiPasquale
Making Music with Logic Pro: Beginner
How do I create a wider stereo image?
Creating width in your mix involves placing sounds across the stereo field in a way that feels spacious but still balanced.
Common techniques include:
- Panning elements left and right
- Using stereo effects like chorus and delay
- Adding reverb to create depth
- Using mid/side processing to widen specific elements
However, it’s important to maintain a strong centre — especially for key elements like kick, bass, and lead vocals.
Too much width can make a track feel unfocused or weak in mono playback, so the goal is controlled width rather than maximum width.
The best stereo images usually come from contrast: some elements feel wide, others stay narrow and solid. That contrast creates size without sacrificing punch or focus.
→ Learn spatial techniques:
The Science of Sound: Reverb
The Science of Sound: Time-Based Effects
Sound Design w/ James Egbert
What makes a good kick and bass relationship?
The relationship between kick and bass is fundamental to the energy and clarity of a track, especially in electronic music.
A strong low end requires:
- Frequency separation so the kick and bass don’t clash
- Timing alignment to create a solid groove
- Dynamic control, often using sidechain compression
Sometimes the best solution is simply choosing better sounds that naturally complement each other.
When done well, the low end feels tight, powerful, and consistent — and the entire track benefits as a result.
This is one of those areas where small changes can have a huge effect. A slightly shorter kick, a cleaner sub, or a different sidechain setting can completely transform the way a track hits and moves.
→ Learn low-end control in context:
Jason Herd: Mixing Kick and Bass
Martin Ikin: Secrets of Tech House
Rudosa Track from Scratch
How do I finish more tracks?
Finishing tracks is one of the biggest challenges producers face, and it’s usually more about mindset than technical ability.
Common issues include overthinking, constantly changing ideas, and chasing perfection. To overcome this, it helps to:
- Set clear constraints
- Work quickly in the early stages
- Commit to decisions rather than endlessly tweaking
- Use reference tracks to guide direction
Watching complete workflows from start to finish is one of the most effective ways to learn how to actually complete music.
A finished track teaches you far more than an unfinished one. Every time you complete a project, you practise arrangement, transitions, mix decisions, and final polish — all of which build real production ability much faster than endlessly looping the first 16 bars.
→ Learn full workflows here:
Rudosa Track from Scratch
Protostar Track from Scratch
DJ S.K.T Track from Scratch
What is sidechain compression?
Sidechain compression is a technique where one sound triggers the reduction of another.
The most common example is the kick ducking the bass, which helps create space in the mix and adds rhythmic movement. This is especially common in house, techno, EDM, and other groove-driven genres.
It can also be used more creatively on pads, reverbs, delays, and effects returns to help the whole track breathe and move with more intention.
Done subtly, sidechain compression improves clarity without being obvious. Done more aggressively, it becomes part of the character of the track and contributes to that familiar pumping feel many producers deliberately want.
The important thing is that sidechain is not just a trend or genre cliché — it is a practical mixing and arrangement tool that can dramatically improve separation and groove when used well.
→ Learn practical sidechain techniques:
The Science of Sound: Compression
Piero Pirupa Track from Scratch
wAFF Track from Scratch
How important is music theory in production?
Music theory is helpful in production, but it’s most valuable when it improves your decision-making rather than becoming something you feel intimidated by.
A basic understanding of scales, chords, intervals, and rhythm can help you write stronger melodies, build more emotional chord progressions, and avoid clashing notes. It can also speed up your workflow because you are making musical decisions with more confidence.
That said, you do not need advanced theory knowledge to make great music. Many producers learn the essentials through practical application — by building tracks, experimenting, and training their ears over time.
The goal is not to become a classical theorist. It is to understand enough to support your creativity, communicate ideas more clearly, and unlock more options when writing.
For many producers, theory becomes most useful when they hit a wall and want to understand why something sounds good, tense, uplifting, dark, or unresolved.
→ Learn theory in context:
Music, No Theory (Level One)
Nicky Romero Digital Music Masterclass (Part 1)
Making Melodic House w/ Eelke Kleijn
How do I improve my drum programming?
Improving your drum programming is usually less about adding more sounds and more about improving groove, variation, and feel.
Strong drum programming often comes down to a few core ideas:
- Using velocity to create movement and human feel
- Introducing subtle timing changes or swing
- Layering sounds with purpose rather than randomly
- Leaving enough space between hits so the groove can breathe
Overly rigid, over-quantised drums can feel lifeless, even if the sounds themselves are good. On the other hand, even simple drum parts can feel exciting if the groove is right.
Processing matters too. EQ, compression, saturation, and transient shaping all play a role in how your drums cut through and drive the record.
The best way to improve is to study how experienced producers program rhythm across different genres, because groove is often the difference between a track that feels static and one that feels irresistible.
→ Learn drum techniques here:
Building a Beat w/ Harry Romero
Making Minimal Tech & Garage
Martin Ikin: Secrets of Tech House
What are reference tracks and how should I use them?
Reference tracks are professionally released tracks that you use as a benchmark while producing, mixing, or mastering your own music.
They help you assess things like:
- Tonal balance
- Low-end weight
- Stereo width
- Arrangement pacing
- Overall loudness and polish
The key is to compare fairly. That usually means level-matching your reference and your own mix, because louder almost always sounds better to the ear even when it actually is not.
Reference tracks are useful because they keep your ears honest. They help you reset your perspective and stop you from making decisions in isolation that only sound good inside your own session.
Used consistently, references train your ears over time. You begin to recognise what a finished record feels like in terms of energy, clarity, and balance, and that makes your own decisions much stronger.
→ See this in real workflows:
One Hour Mixing Workflow w/ Vincent DiPasquale
Jason Herd: Creating a Final Mixdown
Nicky Romero Digital Music Masterclass (Part 3)
How do I make my tracks sound louder?
Loudness is not just about pushing a limiter harder. In practice, louder tracks usually come from cleaner mixes, more controlled dynamics, and stronger tonal balance.
Things that contribute to perceived loudness include:
- Tight low-end control
- Consistent dynamics
- Clear mids and highs
- Harmonic content from tasteful saturation
- A mix that is not fighting itself
If your arrangement is cluttered or your bass is uncontrolled, your track will often sound smaller no matter how much you try to force loudness at the end.
A good loud mix still feels open, energetic, and punchy. A bad loud mix feels flat, harsh, and fatiguing. That is why loudness is really the result of many good choices throughout production and mixing, not just a mastering trick at the end.
→ Learn loudness properly:
Secrets of Pro Mastering
The Science of Sound: Compression
One Hour Mixing Workflow w/ Vincent DiPasquale
What plugins do I really need to start producing?
You need far fewer plugins than most people think. A solid DAW and a small set of core tools are enough to make excellent music if you know how to use them well.
The essentials are usually:
- EQ
- Compression
- Reverb
- Delay
- A few instruments or samplers
What matters more than plugin quantity is understanding how those tools work and when to use them. Many producers slow their progress by constantly searching for new plugins instead of developing confidence with the tools they already have.
In fact, most modern DAWs include excellent stock plugins that are more than capable of producing professional results. Learning those deeply often gives you a much better foundation than jumping between endless third-party options.
Once your skills grow, you can expand your toolkit more deliberately, but at the start, simplicity often helps you learn faster and finish more music.
→ Start here:
Making Music with Logic Pro: Beginner
Learn Ableton Live w/ iLL Factor
Sound Design w/ James Egbert
How do I make better melodies?
Better melodies usually come from stronger musical ideas rather than more complexity.
A memorable melody often depends on:
- Clear rhythm and phrasing
- Repetition with slight variation
- Notes that support the harmony underneath
- A sound choice that complements the idea
Many weaker melodies fail not because the notes are wrong, but because they lack shape, movement, or contrast. Sometimes simplifying a melody makes it stronger and easier to remember.
It also helps to think about rhythm as much as pitch. Great melodies are often catchy because of the way they move through time, not just because of the notes themselves.
Layering, octave doubling, automation, and processing can all help elevate a melodic idea once the core phrase is strong. But the foundation is always the musical phrase itself.
→ Learn melodic techniques here:
Making Melodic House w/ Eelke Kleijn
Eelke Kleijn Track from Scratch
Timmo Hendriks Track from Scratch
What is sound design and why does it matter?
Sound design is the process of creating, shaping, and refining the sounds that make up your track. It matters because sound choice has a huge effect on how original, emotional, and professional your music feels.
Instead of relying only on presets, sound design lets you tailor basses, leads, pads, drums, and textures so they fit the exact energy and identity of your production.
Good sound design can help your music:
- Stand out from generic productions
- Feel more cohesive from section to section
- Support the emotional tone of the track
- Solve mixing problems before they even begin
Even relatively small tweaks — adjusting envelopes, filters, distortion, stereo width, or modulation — can completely change the way a sound behaves in the mix.
In many cases, strong sound design reduces the need for heavy mixing later, because the elements already fit together better from the start.
→ Learn sound design here:
Sound Design w/ James Egbert
Synths & Sound Design w/ D.Ramirez
Creative Sampling w/ Greymatter
How do I structure a track?
Track structure is about controlling energy over time and guiding the listener through a clear musical journey.
In many electronic tracks, that means shaping sections such as:
- Intro
- Build-up
- Drop or main section
- Breakdown
- Outro
But good structure is not just about having the right labels. It is about knowing when to introduce elements, when to remove them, how to build tension, and how to release that tension in a satisfying way.
Strong arrangement keeps the listener engaged without overwhelming them. It creates momentum, contrast, and progression. If everything is happening all the time, the track can feel flat even if the individual sounds are good.
Studying complete song builds is one of the best ways to improve structure, because you can see how experienced producers pace a record from first bar to final section.
→ Learn arrangement in context:
Wankelmut Track from Scratch
Protostar Track from Scratch
Jason Herd: Arrangement Secrets
How long should I spend on a track?
There is no perfect amount of time to spend on a track, because different genres, workflows, and goals all vary. What matters more is whether your time is helping the track move forward or just keeping you stuck in a loop of endless tweaking.
Many producers benefit from working quickly in the early stages to capture ideas while the energy is fresh. After that, refinement becomes important, but overworking a track can often make it worse rather than better.
A good rule of thumb is to focus on progress, not perfection. If you regularly finish music, you will improve much faster than if you endlessly polish unfinished projects.
Each completed track teaches you something about arrangement, sound selection, low-end management, transitions, and final polish. That experience compounds over time and is one of the fastest ways to grow as a producer.
So rather than asking how long a track should take in theory, it is often more useful to ask whether your current process is helping you finish consistently and learn from each project.
→ See real workflows here:
DJ S.K.T Track from Scratch
Robert Babicz Track from Scratch
Piero Pirupa Track from Scratch
We believe you become the best by learning from the best
FaderPro gets you in the studios of the world's best electronic music producers and DJs to learn the creative and production techniques that have brought them global success.
By watching how they create floor-filling tracks, you get to see the secrets of their success and learn how to create your own signature sound, propelling your music career to the next level.
Watch. Learn. Become.
Choose from over 220 courses taught by more than 100 artists from the world's biggest electronic music labels


Pay per course
Choose a course, checkout and get lifetime access
Subscribe
Join the FaderPro Producers Club, get all courses whilst you're a subscriber
Browse a category
Featured courses
With over 25 years of studio experience, a hit-studded discography and an undeniably impressive track record as a composer
Mike Candys has become one of the most important Electro House producers from Europe with international recognition and an ever growing fanbase all around the globe.
A trained studio engineer and jazz pianist, Martin Ikin has been focusing on his own production for the past several years, which has paid off in a major way with many hugely successful tracks.
Tritonal covers the thought process of the vocal and the concept around how "Blackout” was made. They provide you with the entire source files for the record so that you too can re-produce this single alongside with them.
Mega DJ & Producer, Thomas Gold has allowed us into his studio to show the world how he makes his music and specifically, how he created his newest single, "Saints & Sinners."

From intimate clubs to vast festival stages, Kreature's production skillset rivals the best in the business. Never short of creative ideas, he can put his spin on virtually any sound or vibe.
With over 220 courses to choose from, there's bound to be one that will help you level up your own music!
Check out all courses

100% satisfaction guaranteed.